
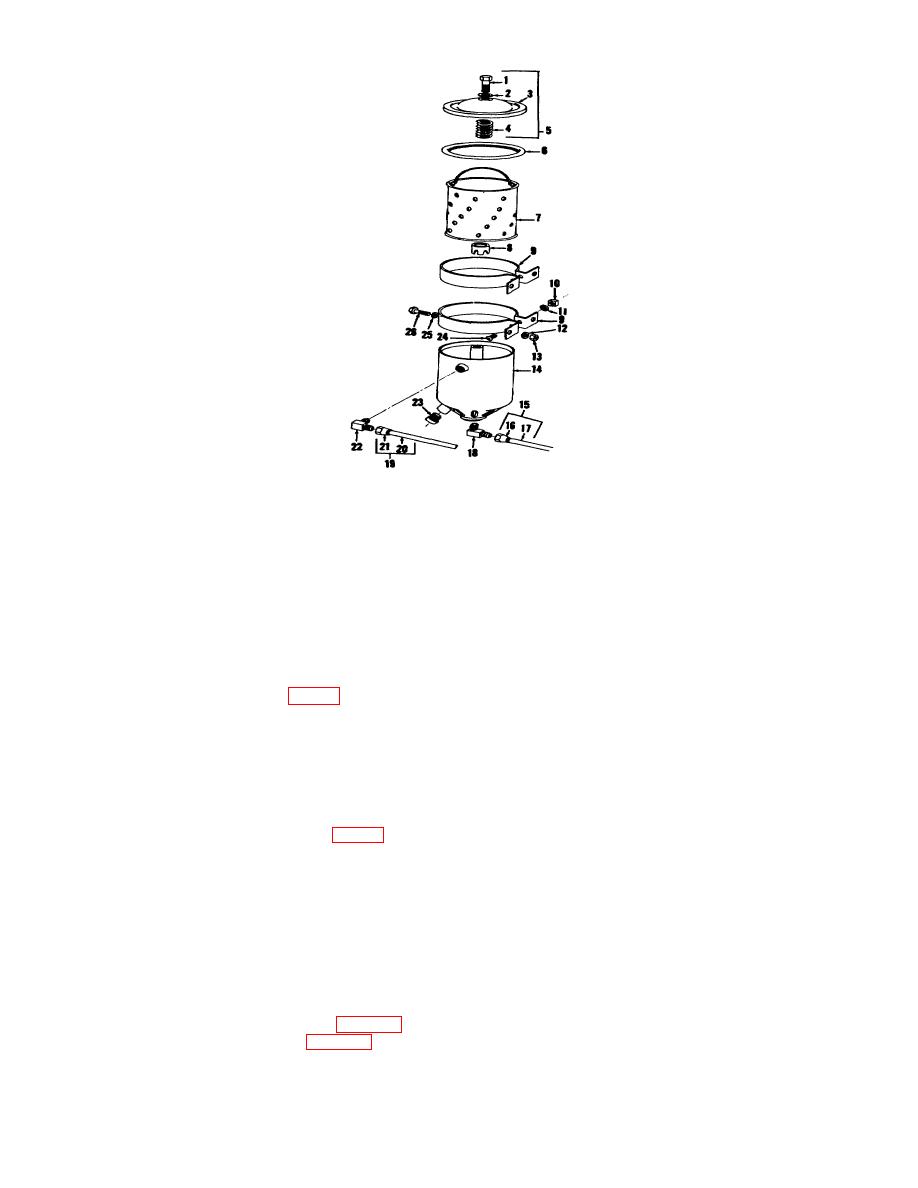
1
Shoulder bolt
14
Filter body
2
Washer
15
Tube assembly
3
Cover
16
Nut
4
Spring
17
Tube
5
Cover assembly
18
Elbow
6
Gasket
19
Tube assembly
7
Element
20
Tube
8
Spacer
21
Nut
9
Clamp
22
Elbow
10
Nut
23
Plug
11
Lockwasher
24
Screw
12
Lockwasher
25
Lockwasher
13
Nut
26
Capscrew
Figure 17. Oil Filter.
(1)
Loosen the clamp (10, fig. 16) securing the oil cup (11) to the air cleaner (3).
(2)
Dispose of the oil in the oil cup.
(3)
Clean the oil cup with a cloth dampened with an approved cleaning solvent and dry thoroughly.
(4)
Fill the oil cup to the oil level mark.
(5)
Position the oil cup (11) on the air cleaner (3) and secure the clamp (10).
g. Oil Filter. Service intervals and the correct grades of lubricant to service the oil filter are prescribed in the
current lubrication order to service the oil filter proceed as follows:
(1) Remove the shoulder bolt (1, fig. 17), washer (2) cover (3), gasket (6), and spring (4) from the oil
filter (14).
(2) Remove the connecting nut (16) securing the outlet oil line (17) to the oil filter (14).
(3) Drain the oil from the filter housing into a suitable container.
(4) Remove the filter element (7).
(5) Wash the oil filter with an approved cleaning solvent and dry thoroughly with a clean, dry cloth.
(6) Install a new filter element (7) being careful to face the correct end toward the top.
(7) Install a new gasket (6) in the cover (3).
(8) Position the spring (4), gasket (6), and cover (3) on the filter (14) and install the washer (2) and
shoulder bolt (1).
(9) Install the connecting nut (16) securing the outlet oil line (17) to the elbow fitting (18) in the filter (14).
(10) Start the engine and pump (para. 34) and inspect for leaks.
(11) Stop engine and pump (para. 35) and repair any leaks noticed.
26