ARMY TM 10-4610-309-14
MARINE CORPS TM 10802A-14/1
0064 00
TACTICAL WATER PURIFICATION SYSTEM (TWPS)
UNIT MAINTENANCE PROCEDURES
COLD WEATHER SYSTEM
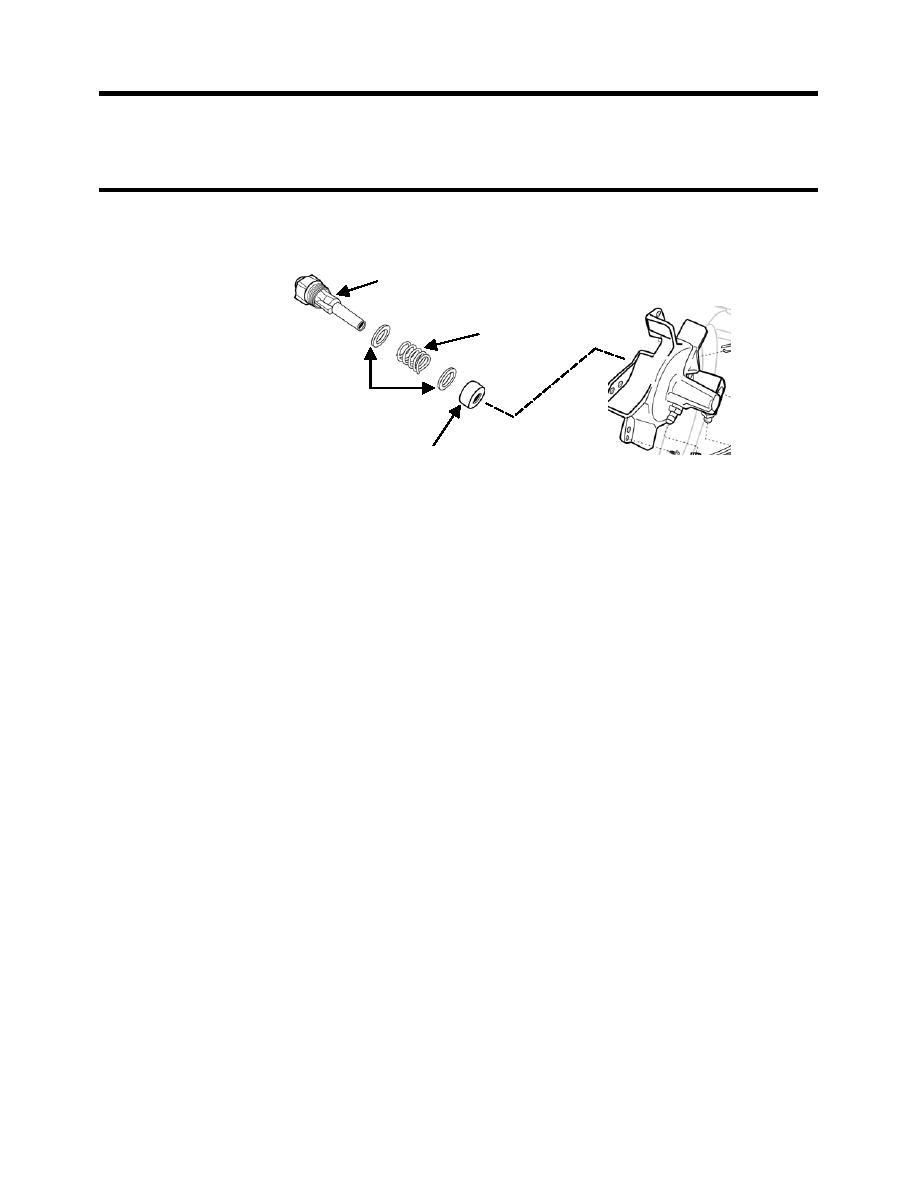
2. Carefully remove the nozzle and its associated components (see Figure 2) from the burner head
using a socket wrench. If the nozzle is damaged, replace the nozzle.
NOZZLE
SEAL SPRING
SEAL WASHER
SEAL SLEEVE
Figure 2. Diesel Heater Burner Head Nozzle.
NOTE
Never use a drill, wire or other tool to open nozzle passage. Any change in the
nozzle opening will alter the flow characteristics of the nozzle and will affect the
heater's performance.
3. Soak the nozzle in solvent for one hour. Dry the nozzle. Blow air into the discharge end of the
nozzle only to clear the nozzle passage. If solvent and air do not remove contamination from the
nozzle, replace the nozzle.
4. Soak the remaining parts of the burner head assembly for one hour in non-flammable liquid
cleaning agent (do not use kerosene or fuel oil.) Air dry.
5. Reinstall the burner head assembly into the heater as follows:
a. Screw the nozzle into the burner head with its associated parts in the order shown in
Figure 2.
b. Secure the photocell bracket to the burner head using the two screws if the bracket was
removed earlier.
c. Position the burner head with the fuel line fitting pointing down and the opening for the
spark plug just above center and to the right, then secure the burner head to the
combustion chamber using the 5 screws.
d. Connect the fuel line to the fuel line fitting at the bottom of the burner head.
e. Connect the air line to the air line fitting at the left side of the burner head.
f. Gently reinsert the photocell all the way in to its holding bracket.
g. Screw the spark plug into the burner head and tighten using the socket wrench. (Do not
over-tighten.)
h. Reconnect the spark plug wire to the spark plug.
i. Position the fan so that the setscrew is aligned with the index in the motor shaft and slide
the fan onto the shaft. (See Figure 3 if necessary for fan positioning.)
j. Tighten the setscrew to secure the fan to the shaft.
k. Close the access panel.
l. Close and snap the top cover.
0064 00-3


