MOUNTING
FOLLOW THE PROCEDURE OUTLINED BELOW TO
ATTACH THE HDC TO THE PUMP.
REMOVING THE OLD HARDWARE
•1.
Thoroughly clean all external surfaces of
the pump and control with steam or
solvent. Blow dry.
•2.
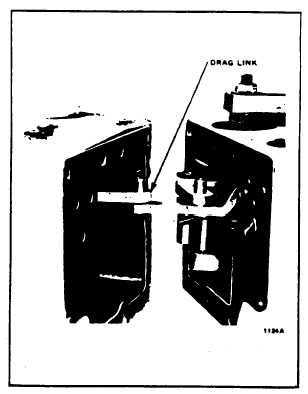
Remove the existing control from the
pump by removing the nine hex head
screws from the housing Slip the pin on
the control linkage out of the end of the
drag link. See Figure 3.
•3.
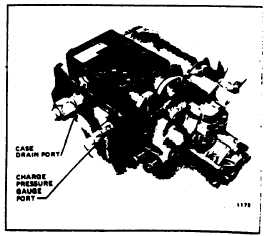
Remove the case drain fitting from the
side of the pump on which the control was
mounted.
•4.
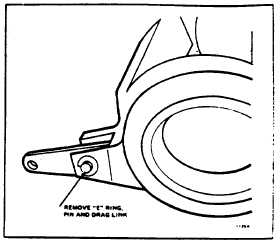
Remove the E-ring from the inside end of
the connecting pin. Use caution not to
drop the E-ring into the housing during the
removal. See Figure 4.
•5.
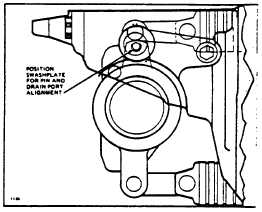
Remove the pin from the drag link and
swashplate through the case drain port
using a magnet or other tool. Remove the
drag link. On some models it may be
necessary to hold the swashplate off
neutral to align the pin with the case drain
hole. See Figure 5.
FIGURE 3. Dry link/Control link connector between
ordinal control and pump.
FIGURE 4. Pin connection to swashplate. Shown
disassembled for clarity.
FIGURE 5. Location of swashplate assembly in
pump housing
FIGURE 6. Location of parts when installing a new
link and bell assembly .