ARMY TM 10-4610-309-14
MARINE CORPS TM10802A-14/1
0012 00
TACTICAL WATER PURIFICATION SYSTEM (TWPS)
OPERATOR INSTRUCTIONS
ESTABLISHING ELECTRICAL POWER OPERATION UNDER
USUAL CONDITIONS
d. Thread the second nut onto the end of the slide rod. (The hammer should be able to
slide freely up and down the slide rod between the striker plate on the one end and the
nut on the other end.)
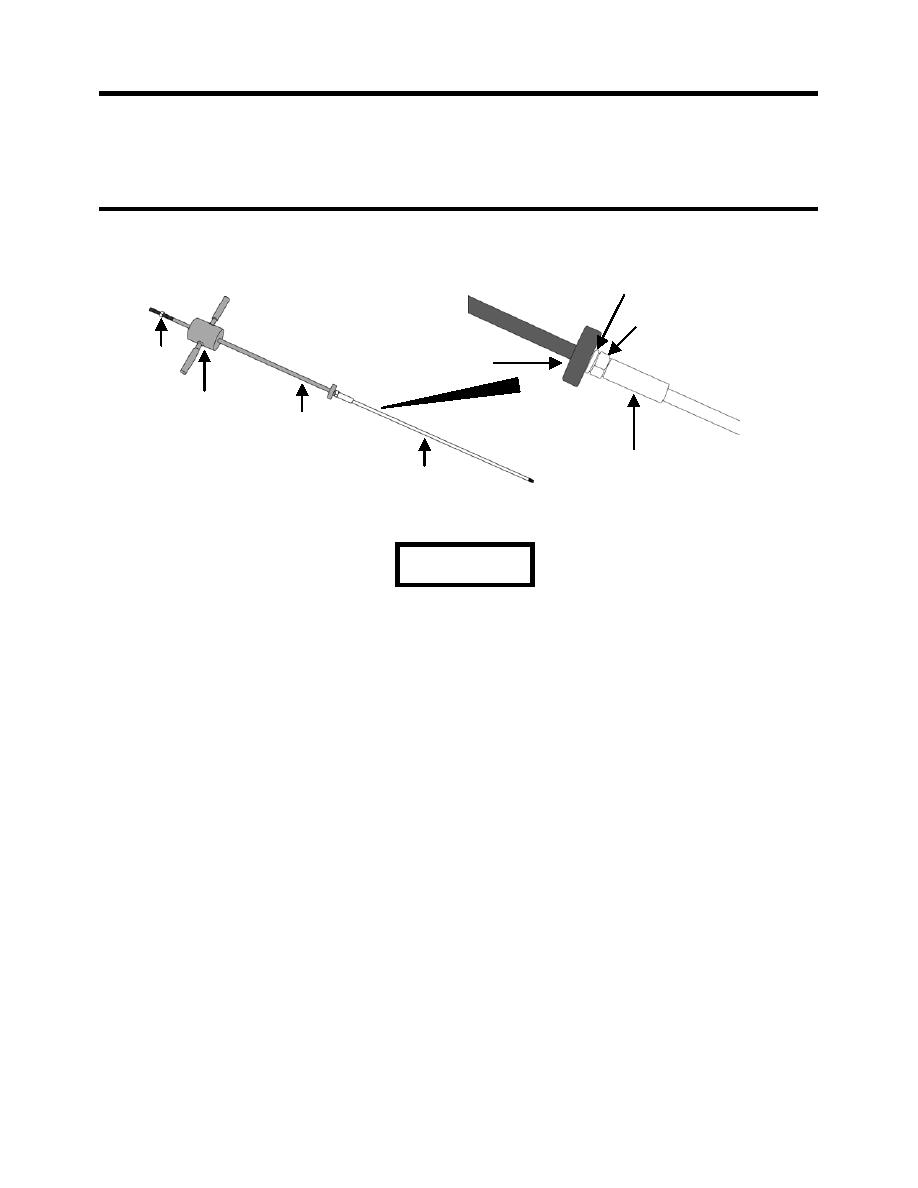
LOCK WASHER
NUT
NUT
STRIKER PLATE
SLIDE HAMMER
SLIDE ROD
COLLAR
GROUND ROD
Figure 2. Slide Hammer Assembled to Drive the First Ground Rod.
WARNING
To prevent damage to the slide rod, ground rod, or collar threads, make sure that
the slide rod and ground rods bottom out against each other (are threaded
completely together.) Any slop in the connection will lead to damaged threads.
4. Drive the first ground rod into the ground as follows:
a. Thread the striker plate end of the slide hammer assembly all the way into the collar of
the first ground rod until the slide rod bottoms out against the ground rod.
b. Using the slide hammer, drive the first ground rod into the ground leaving about 3 in.
exposed.
5. Thread a second ground rod onto the first ground rod and drive both into the ground as follows:
a. Unthread the slide hammer assembly from the collar of the first ground rod.
b. Thread a second ground rod all the way into the collar of the first ground rod that is
already in the ground.
c. Thread the slide hammer assembly all the way into the collar at the top of the second
ground rod until the slide rod bottoms out against the ground rod.
d. Drive the assembled first and second rods into the ground leaving approximately 3 in. of
the second ground rod exposed.
6. Thread a third ground rod onto the second ground rod and drive into the ground as follows:
a. Unthread the slide hammer assembly from the collar of the second ground rod.
b. Thread a third ground rod all the way into the collar at the top of the second ground rod.
c. Thread the slide hammer assembly all the way into the collar at the top of the third
ground rod until the slide rod bottoms out against the ground rod.
d. Drive the assembled first, second, and third ground rods into the ground leaving
approximately one foot of the third ground rod exposed.
7. Uncoil the ground cable. Secure one end of the cable to the rod using the cable clamp. Unscrew
the nut from the grounding lug to expose the slot in the lug.
8. Connect the other end of the ground cable to the generator ground lug and tighten the lug nut
securely.
0012 00-3


