ARMY TM 10-4610-309-14
MARINE CORPS TM 10802A-14/1
0066 00
TACTICAL WATER PURIFICATION SYSTEM (TWPS)
UNIT MAINTENANCE PROCEDURES
GENERAL MAINTENANCE
PISTON
POSITION INDICATOR CAP
TRAVEL STOP
ACTUATOR BODY
PISTON BACKING PAD
SEALING WASHER
PISTON O-RING
TRAVEL STOP
LOCK NUT
PISTON SUPPORT RING
AIR CONNECTION
END CAP O-RING
PLATE O-RING
TRAVEL STOP BOLT
SPRING ASSEMBLY
AIR CONNECTION PLATE
END CAP
CAP HEAD BOLT
FLAT WASHER
AND WASHER
TOP SPACER
SHAFT TOP O-RING
END CAP BOLT
PINION SHAFT
TOP BEARING
BOTTOM SPACER
BOTTOM BEARING
SHAFT BOTTOM O-RING
BASE PLATE O-RING
SLEEVE GUIDE
INNER GUIDE
SPRING WASHER
OUTER SPRING
INNER SPRING
BASE PLATE CAP HEAD BOLT
SHAFT ADAPTER
BASE PLATE
ADAPTER SLEEVE
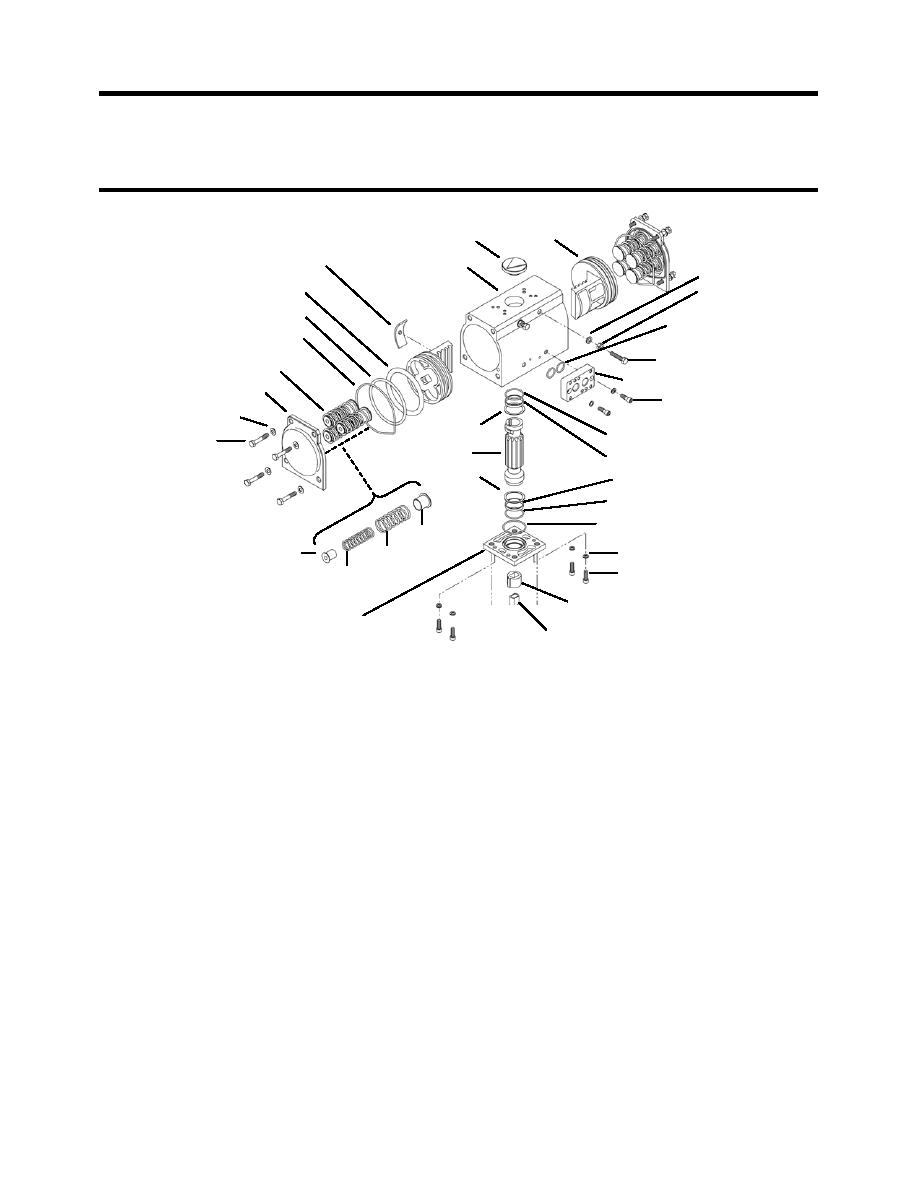
Figure 20. Actuator Disassembly.
2. Clean all the disassembled components.
3. Remove and replace the following components with new components (see Figure 20):
a. Shaft top O-ring
b. Top bearing
c. Top spacer
d. Shaft bottom O-ring
e. Bottom bearing
f. Bottom spacer
g. Base plate O-ring
h. Piston O-ring (one on both of the pistons)
i. Piston support ring (one yellow green ring on both of the pistons)
j. Piston backing pad (one on both of the pistons)
k. End cap O-ring (one on both of the end caps)
l. Air connection plate O-rings (two)
4. Reassemble the actuator as follows (see Figure 20):
a. Lubricate the body bore (inside of the actuator body) with molybdenum disulfide grease.
b. Lubricate all O-rings, bearings, and support rings with molybdenum disulfide grease.
c. Assemble the pinion shaft and base plate to the actuator body as follows:
1) Coat the bottom of the pinion shaft with molybdenum disulfide grease.
2) Carefully insert the pinion shaft into the base plate bore, finishing with a firm push
to make sure that the shaft is fully seated in the bore.
0066 00-22


