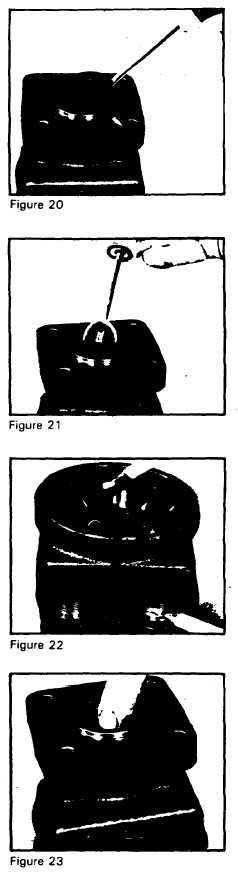
remove seals
16.
Remove housing (15) from vise
and place it on a clean flat work
surface with wearplate end down.
Pry out and discard the dirt and
water seal (20) and inner seal (16)
using a dull-edged screw driver.
Be careful not to gouge or nick
other components during the pro-
cess. SEE FIGURE 20 and 21.
inspect housing
17.
Inspect the housing (15) assembly
assembly
for cracks, the housing machined
surfaces for nicks, burrs, brinelling
or corrosion. Remove burrs that
can be removed without changing
dimensional characteristics.
Inspect the tapped holes for
thread damage. SEE FIGURE 22. If
the housing is defective in these
areas, discard the housing (15)
assembly and commutator (9)
assembly and the disassembly of
the MAF TorqmotorTM is
completed. If the housing
assembly passed inspection to
this point, continue the inspec-
tions per Step 18.
inspect housing
18.
Inspect the outer bearing (19), the
bearings, thrust
inner bearing (12), the thrust
washers & backup
bearing (14), thrust washers (13),
washer
and back-up washer (17), while
assembled in the housing (15).
The bearing rollers should be
firmly retained in the bearing
cages, but must turn and revolve
freely. The full complement of
bearing rollers and the thrust
washers must be free of brinelling
and corrosion. Seal back-up
washer must be free of cracks,
chipped edges or burrs. SEE
FIGURE 23. If the housing
assembly passed this inspection,
and the inspections in Step 13
and 17, the disassembly of the
MAF TorqmotorTM is completed.
If only the bearings, thrust
washers, or back-up washer show
deterioration, they can be
replaced. Go to the next step.
13