TM 10-4610-310-14
0120 00
ASSEMBLY
Before Assembly
1. Thoroughly clean and check all parts for wear, discoloration, cracks, etc.
2. Ensure all the oil seals are reinstalled if removed.
3. Apply clean engine lubricating oil to the sliding and rotating parts.
4. Use new O-rings and gaskets.
5. Make sure the clearance between parts (oil, thrust, etc.) is correct.
6. Align matching marks on parts when assembling.
7. Use the proper bolts, nuts, and washers.
8. Tighten the major bolts and nuts to the specified torque.
Crankshaft
1. If removed, install the crankshaft bearing in the crank case cover.
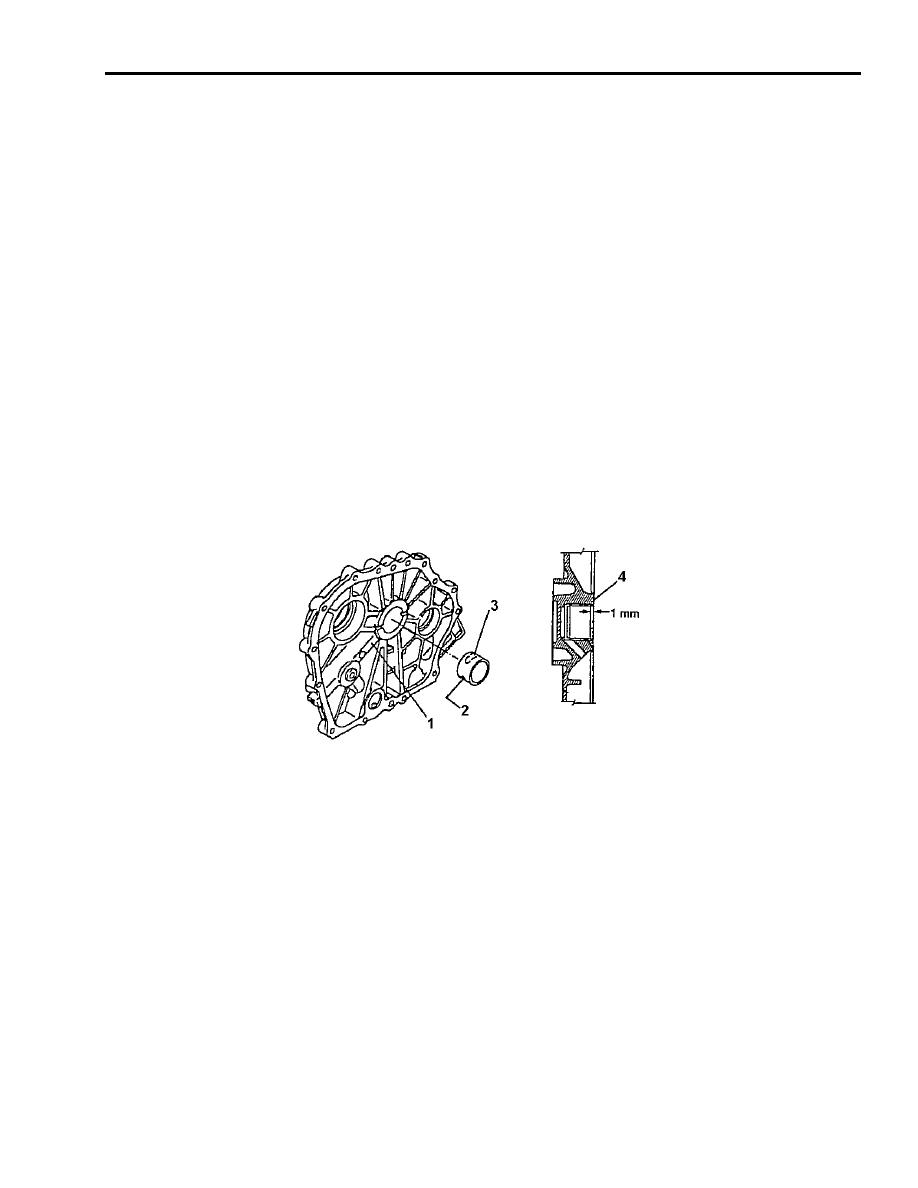
2. Ensure the oil groove (3) is facing up and oil hole (2) on the bearing is lined up with the oil passage (1). See
Figure 7.
3. Ensure that the bearing is sunk 0.0394 inch (1 mm) below the face of the crankcase cover (4).
Figure 7. Crankshaft Bearing Installation.
4. Install the crankshaft with gears into the engine block and attach screw (1) and retainer (2). See Figure 6.
5. Attach the two keys to the crankshaft.
6. Apply high temperature anti-seize compound to both ends of the crankshaft.
Flywheel
1. Align the keyhole and install the flywheel onto the crankshaft.
2. Reinstall the locknut (5) and washer (4). See Figure 5.
3. Torque the locknut between 101 to 108 ft-lb (13729 14710 N-cm)


